Here is the featured picture:

You can see it online here by going to the fourth slide in the slideshow.
This post originally appeared on Kate’s Point of View. © Kate. All rights reserved.

Here is the featured picture:
You can see it online here by going to the fourth slide in the slideshow.


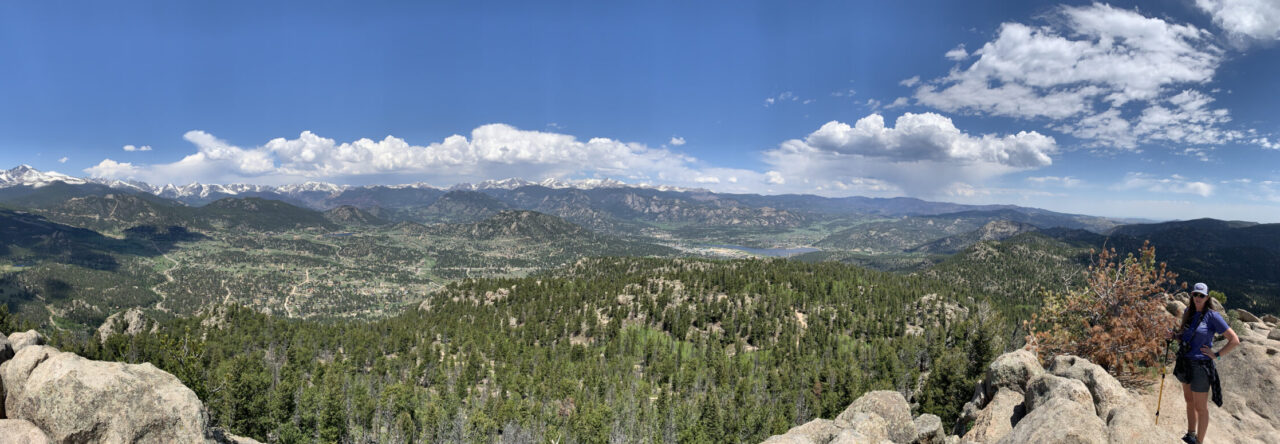
Despite all of that, or potentially because of it, I had a wonderful time.
There is something nice about getting so far removed from your routine that you can’t help but forget about looming tasks and chores. We hiked, roasted marshmallows, popped popcorn over the fire and got to see bears. Yes, bears.
Seeing the bears was a little because they were foraging for garbage. It’s great that they are able to get plenty to eat, but unfortunate that it has to happen at a cost to their more natural foraging and hunting instincts.


Some other pictures from the trip:

 |
| Photo credit to Wonder Boy |

 |
| Me, Easy Breezy and Frank the Tank |

Using Photoshop you can get the exact color of any point in an image. It will get you the information in numerous ways:

When you click your mouse anywhere on the color picker, the values for HSB, RGB, Hex, Lab and CMYK will all adjust accordingly.
By selecting the Color Libraries button, you can also view colors by common color systems. See the full list in the image below.

Knowing this is one thing, but it’s only useful if there are real world applications. And so:
Ultimately, most people trying to match two colors just eyeball it. But by using Photoshop you can create pieces that look much more polished and pulled together.
How to Do It
The Color Picker is one of the easiest tools to use. Open an image and then click on the layered color boxes in your toolbar that look like this:  . A window will open up and that’s your Color Picker. You’ll notice that if you move your mouse around over top your open image (outside the borders of the color picker window), your cursor will change to an eye dropper. Use this to sample a color from your image. Click in several different places on your image and you’ll see the color data in the color picker window change accordingly. You can also select a color right within the Color Picker window.
If you are only working within Photoshop, select your color and hit OK. This will change the colors shown in your toolbar for foreground color. (If you want to select a new background color, click on the ![]() curved double around to switch your colors and repeat the selecting process.)
curved double around to switch your colors and repeat the selecting process.)
If you want to take the color you just got from Photoshop and use it in another program, you will need the data shown in your color picker window here:

There are so many types of software you could use this in but I’ll only cover Microsoft Word here. To change the color of type to match what you are working with in Photoshop (and you would use these same steps for almost any other color in Word), go to your font color tool, which will reveal a window a new window.

Click on the more colors option, which will open up a new window. Select the Custom tab and the view will change to something similar to the Color Picker in Photoshop.

In the Red, Green and Blue fields you can type in the fields from R,G and B in Photoshop. This will result in a color that is an exact match to what you selected in Photoshop.
Want to start from the beginning? View class 1, which reviews the Photoshop toolbar. View Class 2, which reviews pictures for print versus web. View Class 3, which explores cropping and resizing images. View Class 4, which reviews balancing color. View Lesson 5, which goes over the clone stamp tool.
As always, see something you disagree with or think is just plain wrong? Tell me! Seriously – I want to know.

The Clone Stamp Tool is wonderfully powerful. Using this tool you can remove blemishes from an image (or from a person!), take out extra noise in the picture or have creative license with reality.
An example of what you might like to edit is this image of a lizard.

The picture is perfectly fine but the green item on the cement to the left is distracting and so is the smaller red item in the crack of the cement. With the Clone Stamp Tool, those distractions can be removed:

The same methods detailed below can take a logo off of someone’s shirt, remove a pimple, erase stray hairs and even make someone look thinner.
The Clone Stamp Tool allows you to clone, or copy, one part of an image over the top of another. To use the tool, first select the Clone Stamp Tool, whose icon looks like  . Before you can start copying over an area of your image, you need to decide where you are copying color from. You select this directionally by placing your cursor on your image, clicking the alt key and dragging your mouse in a direction. When you let go of your mouse, the distance between where you started and ended your cursor indicates the distance and direction from which your Clone Stamp Tool will be pulling color. It’s confusing but makes sense once you’ve tried it a few times.

You will likely have to change the spot from which you are copying several times throughout the editing process. You may have to change the size of your stamp because if you are working with one that is too small or too big you will run into all kinds of trouble. To change the size of your stamp, click on the circle near your File and Edit menus. This will produce a screen like this:

Either click on the size stamp that works best for you for the display of stamps, drag the slider to the desired size or type in the width of the stamp you would like into the field where “19 px” appears in the image above.
It takes a while but after some painstaking work, the sign is gone.

Want to take creative license with an image? Clone yourself whatever type of image you want.

This picture was intended to be much less creepy, but you get the point.
Want to start from the beginning? View class 1, which reviews the Photoshop toolbar. View Class 2, which reviews pictures for print versus web. View Class 3, which explores cropping and resizing images. View Class 4, which reviews balancing color.
As always, see something you disagree with or think is just plain wrong? Tell me! Seriously – I want to know.

The Cincinnati Color Company building, which houses a boxing ring in which Ezzard Charles fought.

In this building George Cox, Cincinnati’s political boss, wheeled and dealed. And, it was in there that the idea was had to have a baseball world series!

St. Francis Seraph played an integral role in the earlier history of Cincinnati, especially when it came to proving help to the poor, which they still do today.


This was a beer garden at one point in time that featured performances by the strongest many in Cincinnati. Later it became part of the set for Rage in Harlem starring Gregory Hines. It was also home to The Warehouse, a nightclub.


If you’ve not been on the Queen City Underground Tour, I highly recommend it. They do a good job of highlighting the fabulous history of the Over-the-Rhine community in Cincinnati and you get access to building you would never get to enter otherwise.
Powered by WordPress & Theme by Anders Norén